Saturday, December 15, 2012

Fall Houseplant Recap

Note: This post was from late October, I kinda forgot about it but better late than never :)
 
 
 I'm getting some blooms for fall in my indoor "garden"! The small Christmas cacti I'd purchased off Ebay just a few months ago are blooming nicely.
 
 The passionflower vine is growing well, but needs to be cut back.
 
 There! This will help the vine become more sturdy, and keep it on the trellis rather than all over the room.
 
Signs of life from a formely failing Christmas cactus (I'm not one to give up on my dying plants until they're brown and crispy.)

My big angel trumpet (Brugmansia) is rebounding after being cut back....
...but this inch plant needs attention now. Too ratty with lots of dead stuff.
There! Looks sparse, but it will come back much fuller and healthier (hopefully.)
Top-dressed my "Snake Plant", Sansevieria trifasciata with some cactus mix, and watered it well. My mom calls this plant "mother in-law's tongue", there are many different varieties including some with really rounded/tubular leaves. I'd like to collect more eventually.
 
I got this cool old glass dentist's chair tray off Ebay, and I know just what to do with it....
...looks like it will hold some water....
...just enough for my carnivorous plant collection. The color will reflect back some light also.
Little glass koi looks right at home!
This pitcher plant is growing well, but getting kind of gangly. I can let it go like this, or cut it back for a bushier form.
Although it makes me nervous, I decided to cut it back. Hopefully it responds well.
What a mob!
Perhaps I've gotten rather carried away collecting houseplants....
...nah!

New Cactus Re-potting

Here are two lovely cacti that my dear friend from Texas sent me awhile back. I've been collecting vintage planters, and now I'm ready to repot my new prickly friends.
 
 
Here are the pots in question: two nice planters from the McCoy pottery line, approximately 1960's vintage.
I use tongs to handle the cacti, preferably metal ones with an open loop grabbing area so I don't smash too large an area on the cacti, but all I had on hand were these. (I have since gone to the dollar store for the metal tongs.) My soil mix includes aquarium gravel, sand, bone meal, decomposed granite, kelp meal, greensand, and bunny "beads" (poop :)
This cute barrel cactus is 'Balloon Cactus', Notocactus magnificus....
...there! Magnificus indeed!
This one is 'Torch Cactus', Trichocereus grandiflorus hybrids...
...voila'! Looks happier already!
I gave them some water, and that will be all they get until March or so when their growing season begins again.
So far this winter I've been able to keep my plant room fairly cool, especially at night. I'm hoping this will stimulate blooms from some of my cacti, maybe even these new ones. Fingers crossed!

Sunday, November 11, 2012

From Worm Farm to Worm Condo

Sometimes you just have to downsize, and that time has come for my worm bin. Hard to believe, but I've been raising worms in a bin that I made from plastic storage containers since 2006! The plans I used to build my original bin are here, and the posts I've done over the years are here. Since relocating to an apartment I am shorter on space, so I've decided to switch to a store-bought worm bin that's more of a "tower" in configuration. They run about $100 online, but after shopping around I got mine plus extra trays/levels for less than that (mostly on Ebay.)
 

Here's the setup, it even came with a brick of coir and this handy rake.

Cute worms on the lid (in case you forget what's inside :)  I like the shape of the lid too, my cats can't really lay on it comfortably (even if they do, it won't really push down on the worms like the lid with my old bin.)
It has this handy nozzle for draining off leachate, which is filtered by the cloth you see sticking out above. The cloth helps prevent worm drownings, too.
Hole size seems well-suited for worm migrations between levels...
...the holding area for leachate has an adequate capacity as well.
Okay, time for assembly now that my assistant Gizmo is here to help =^^=
For this first tray I decided to put down wet paper towel in the bottom to keep bedding and worms from falling through right away. The leachate should still drain through just fine....
...there!
Now I put down a layer of moist coir...
...then I turn to the homemade bin for some wormy tenants.
There they are! The moisture level in this old bin is too high, and that will be addressed later.
So I scooped out a layer of worms and their bedding from the old bin, about 2" deep. I tried to include plenty of un-eaten foodstuff too, so they have something to eat as my newer food scraps break down enough to be edible to the worms.


Then I add a sprinkling of a "fattening mix" of food that I created, based on suggestions from several worm forums. The mix I came up with is: 50% "flock raiser" pelleted chicken feed, 10% unbleached wheat flour, 10% powdered whole milk, 10% wheat germ, 10% crushed eggshells (rinsed and dried before crushing), and 10% corn meal. I would recommend drawing your own conclusions from some research, as I am not an expert or pro by any means.
Then I added another layer of coir....
...followed by some too-soft-to-use potatoes.
I put a few in the old bin too, along with some compostable cellulose packing peanuts. I'd never added these to a worm bin in the past, but I figured that being plant cellulose they can't do any harm (hopefully)!
My new bin will be housed in the bathroom for now, until I can figure out what I want to do with the old bin. I thought I might put it on "Freecycle", but I'm not sure how many more years are left in it. I may just take it back home and dismantle it there.
Then I added corn husks....
...coffee grounds....
....and more coir.
Let's see how the worms enjoy their new "digs" (pun intended :)

Sunday, October 21, 2012

Houseplants Update

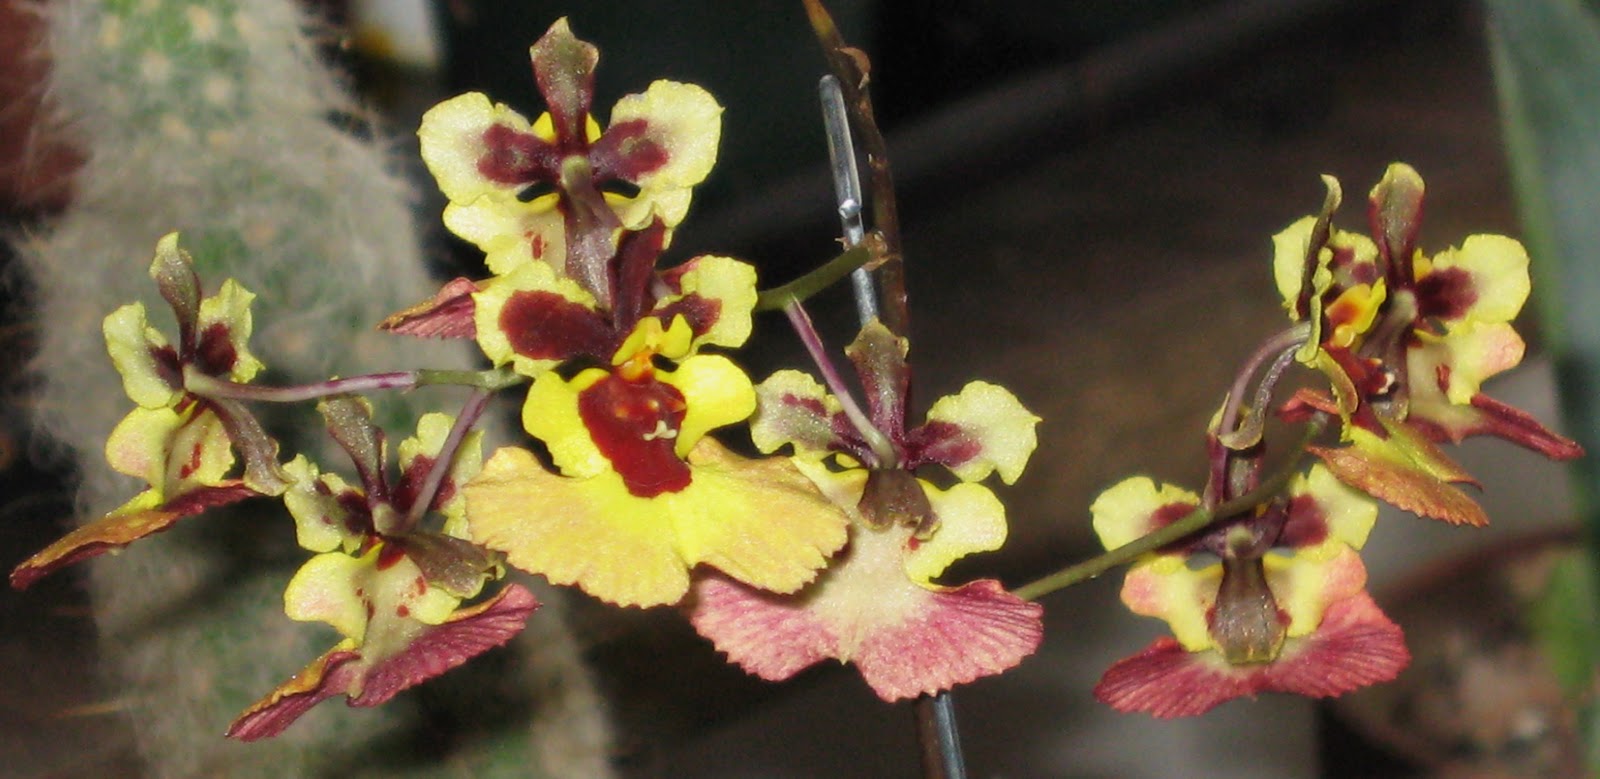
My tiny tolumnia is blooming beautifully...
...so many pretty flowers....
...on such a teeny orchid.
I relocated the lithops so they're all as close to the window as possible...
...and finally got all three of my new Christmas cacti planted up.
They say stolen plants grow best, so I hope this nice vine that I "acquired" will follow the logic.
I'd acquired a couple more recently, and they are rooting well in this cup of water...
...now all the "contraban" can keep each other company.
Back on September first, I was at my wit's end trying to keep my Orchid Cactus (Epiphyte) 'Raspberry Ribbons' alive, so I put a piece in this yogurt container and set it in with my carnivorous plants to see if bog-like conditions would help.
Turns out it did!
The mother plant was placed into this moisture-wicking african violet pot. While not thriving, it's still alive so for now I'll go with it. May as well try two different methods and see what happens. The reasoning behind trying some altenative growing conditions is to try and keep plants alive that I've routinely murdered in the past. Regardless of conventional cultivation wisdom, I have to find out what works for me-in my "got busy-musta forgot-oh crap I spaced watering and now it's dead" lifestyle. Needless to say, these methods may not work for you. And if I lived in an area with higher ambient humidity they may not work for me, either. But I gotta deal with here and now, such as it is.
So happens that my african violet is quite pleased with here-now, and is blooming again.
 
The funnel orchid project has flamed out already, it began the other day when I suddenly smelled mold in my plant room...
 ....there it is. I kinda suspected this may happen when I made my orchid media "parfait" layers. Not enough air gap for sure, I should have used larger chunks of media with no moss.
 
 This poor orchid will hang out here until I come up with plan B....
...I hope it survives long enough!